By Ilane Tall · Updated August 22, 2026 · Research-based.
Reader-supported: we may earn a commission when you buy through the links on this page, at no additional cost to you. It never changes which product we recommend. Prices quoted below were correct at the time of writing and move often.
The short version
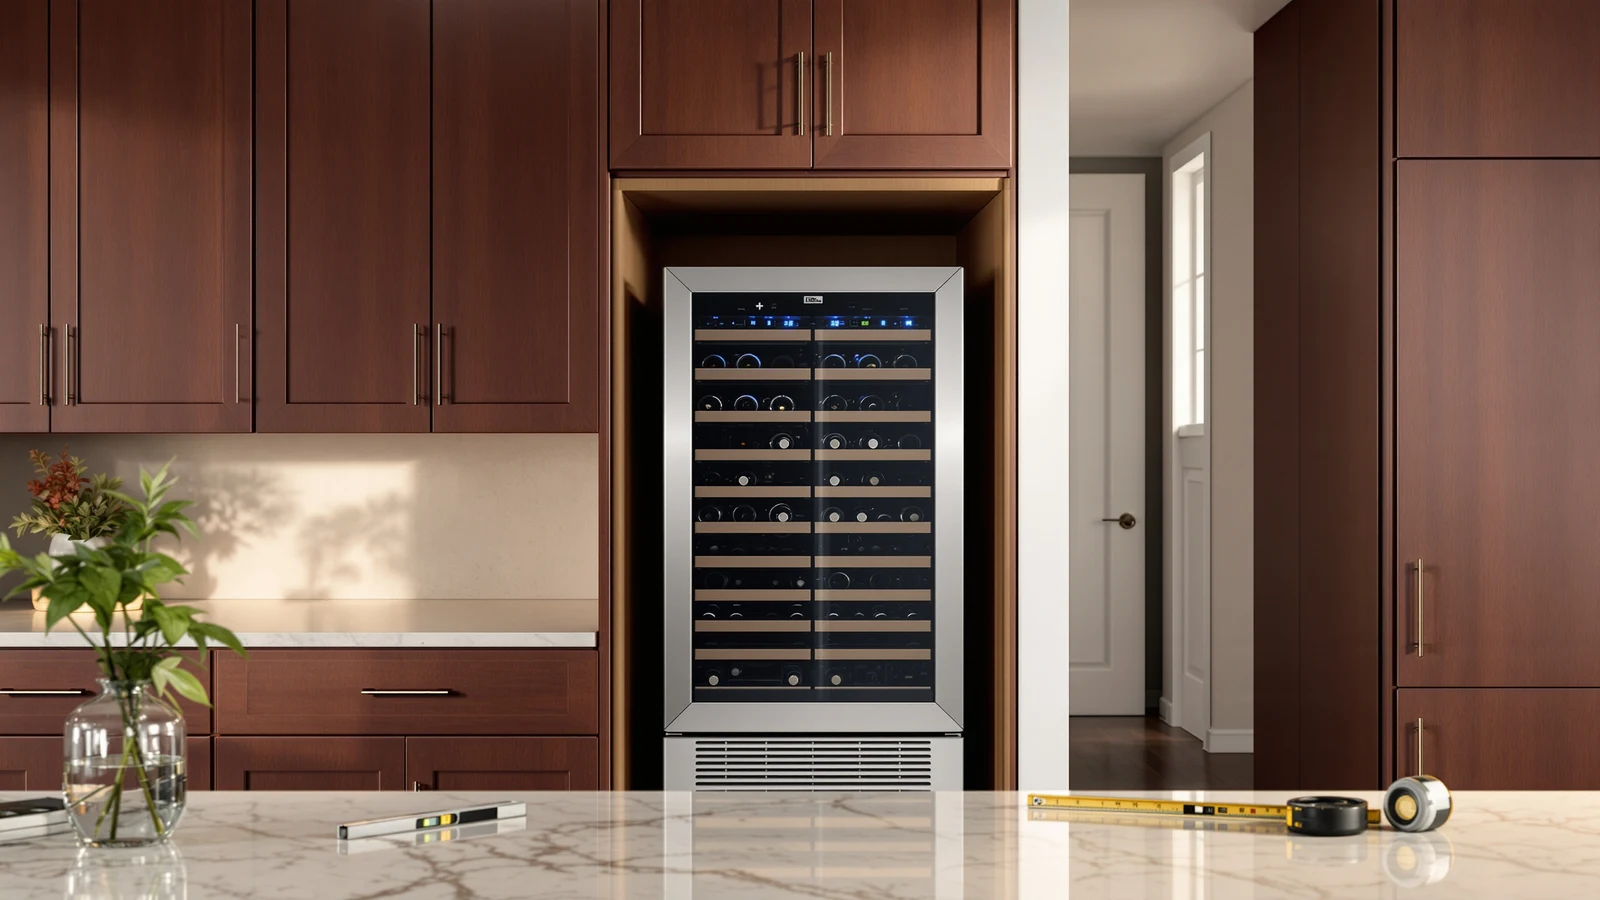
Before anything else, confirm the unit is actually rated for built-in installation — a freestanding compressor cooler sealed into a cabinet cooks itself. Then measure the opening on all three axes plus the door swing, respect the clearance the manual specifies around the front grille, and get the cabinet level so the door closes on its own.
On power: it wants its own grounded outlet, not an extension cord, and it wants to sit upright for a few hours before you turn it on if it travelled on its side. Do all of that and the first 24 hours look boring, which is exactly what you want.
If the opening has no way to vent a front grille, or there's no outlet within reach, that's the point to call someone rather than force it.
First: confirm the unit is actually rated built-in
This is the step people skip because it feels obvious, and it's the one that kills more compressors than anything else in this guide. A compressor wine fridge cools by moving heat out of the cabinet and into the room. A true built-in model does that through a grille on the front of the unit — the compressor, condenser and fan all sit behind it, so the heat has somewhere to go even when the sides and back are boxed in by cabinetry. A freestanding model rejects that same heat out of the back and sides, the way a normal refrigerator does. Seal a freestanding unit into a cabinet run and the heat it produces has nowhere to escape: the compressor runs continuously trying to reach a setpoint it can no longer hit, and it typically fails well before it should. This is the single most expensive mistake in the category, and it happens because the installation looks identical either way until the unit has been running for a few weeks.
The complication is that the word "built-in" gets used loosely in product titles, and titles are not the authority — the installation section of the manual is. It's common to see a listing describe the same unit as both an "upgraded built-in" cooler and suitable "for home freestanding" use in the same sentence, which tells you nothing about whether it actually vents from the front. Don't resolve that ambiguity by guessing; open the manual and look for a stated clearance for enclosed installation, or the words "front-venting." If the manual only discusses clearance on the back and sides, treat the unit as freestanding-only, regardless of what the title says.
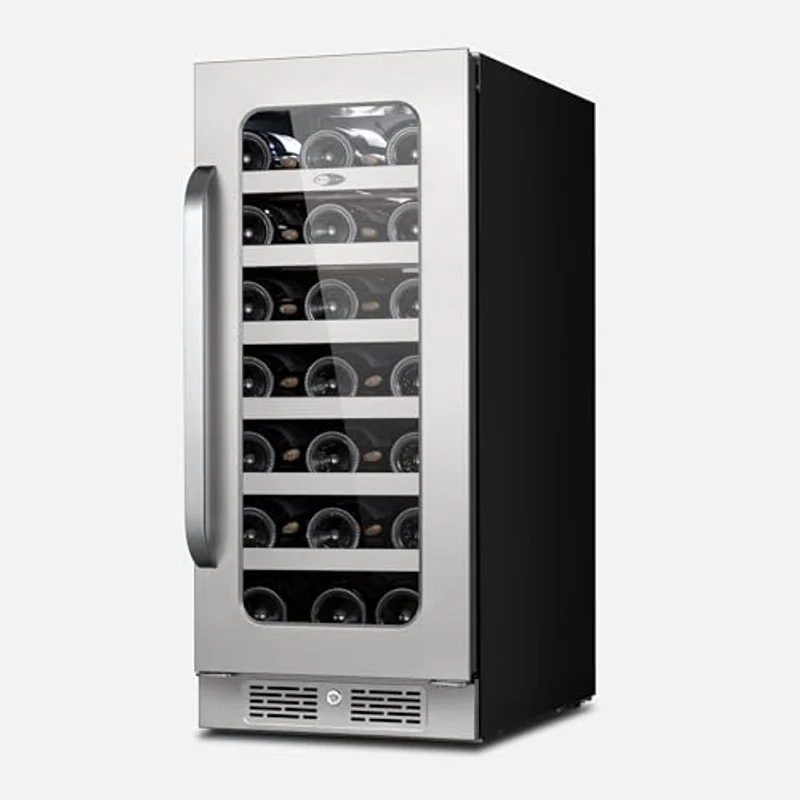
Some units remove the guesswork. The Whynter BSR-033SW is sold explicitly as a built-in undercounter wine refrigerator, with the front-venting design and clearance figures stated as part of the listing rather than left for you to infer. That's the pattern worth shopping for: a manufacturer that states installation type as a specification, not a marketing adjective. If you're still choosing a unit rather than installing one you already own, our built-in vs freestanding wine fridges guide walks through how to tell the two apart from a listing before you buy, and our roundup of the best 15-inch undercounter wine fridges only includes models rated for enclosure in the first place.
Measuring the opening: width, depth, height, and the door swing
Once you know the unit is rated for the job, measure the actual hole it needs to go into — not the cabinet's nominal size, the opening as it exists with any face frame or trim already accounted for. Four numbers matter, and the fourth one is the one people forget.
- Width. Measure at three heights — top, middle, bottom — because face frames and out-of-square cabinetry can pinch an opening partway up. Undercounter units are built to a standard nominal width, most commonly 15 inches, but "nominal" leaves a small tolerance either way; check the manufacturer's stated cutout width, not just the advertised size.
- Depth. This is where built-in units most often get returned. The unit needs to sit flush or near-flush with the surrounding cabinetry, so the opening's depth has to accommodate the cabinet body plus whatever the front grille and door add. Measure from the front face of the opening straight back to any wall, duct or plumbing that could block the rear panel and the airflow path behind the grille.
- Height. Measure under the countertop overhang, not to the top of the cabinet frame — the overhang is usually what actually limits how tall a unit will fit, and it's easy to measure the wrong reference point and be off by enough to matter.
- Door swing arc. Open a tape measure to the door's full swing radius and check it against what's next to the opening — an adjacent drawer, an island corner, a walkway. If the space is tight, look for a reversible door, which lets you hinge it to whichever side clears the obstruction.
Two of the products worth naming here illustrate why depth matters more than people expect. The Techomey 15-inch 31-bottle and the Whynter BSR-033SW are both sold in the standard 15-inch width, but width alone doesn't tell you whether either fits your opening — depth and the space behind the grille decide that, and those numbers belong in the manual, not the marketing copy. The Icyglee 15-inch dual zone is the same story: we don't have a published cutout depth for it here, so pull the exact figure from the current listing before you order rather than assume it matches a similarly sized unit.
The clearance the manual specifies — and why the grille needs air
Even a genuinely built-in, front-venting unit isn't clearance-free. The manual will specify a minimum air gap — commonly a small margin above the unit and sometimes at the sides — to let the fan pull room air across the condenser and push warmed air back out through the grille. That figure is model-specific and printed in the installation section; don't assume it's zero just because the unit is rated for enclosure.
The part that's easy to overlook after installation, rather than during it, is that the front grille has to stay unobstructed for the life of the appliance. A kick plate installed too tight, a decorative panel added later, a bath mat leaned against the front — anything that blocks the grille reduces airflow the same way sealing the unit in a cabinet would, just more slowly. If the unit runs longer than it used to, or the front feels warm, check the grille first; our wine fridge not cooling checklist covers what else to rule out.
A quick gut check before you close anything up: if you can't find a specific clearance figure for enclosed installation anywhere in the manual, and the manual doesn't use the words "front-venting" or "built-in," don't enclose it. Run it freestanding with the sides and back exposed until you've confirmed otherwise with the manufacturer.
Levelling: why an out-of-level cabinet stops the door self-closing
Most undercounter wine fridges rely on a small amount of built-in rearward tilt to close their own door — the same principle a refrigerator door uses. Tilt the cabinet slightly back and gravity does the last few degrees of closing for you, which matters because a door left slightly ajar is a slow, quiet failure: it doesn't trip an alarm, it just lets warm, humid room air trickle in continuously.
If the cabinet is out of level — tipped forward, or leaning to one side — that self-closing mechanism stops doing its job. A door that doesn't fully seat against the gasket lets warm air in every time the compressor cycles: the compressor works harder to hold its setpoint, and the warm humid air condenses the moment it hits the cold interior — on the glass, the gasket, sometimes pooling at the bottom of the cabinet. Persistent condensation around the door seal is one of the more common signs of a levelling problem rather than a defective unit.
The fix is mechanical, not electrical: use a bubble level across the top of the unit both side-to-side and front-to-back, and adjust the leveling feet (or shim the base) until it reads level in both directions, with a slight rearward lean if the manual specifies one. Re-check after the unit has settled for a day, since cabinetry and flooring can shift slightly once the weight is fully on the feet.
Electrical: a dedicated outlet, no extension cords, and standing it upright first
Three things worth getting right before the unit ever gets plugged in.
Give it its own grounded outlet. A wine fridge's compressor draws a start-up surge higher than its steady running current, and sharing a circuit or outlet strip with other kitchen appliances increases the odds of nuisance tripping or, on an older circuit, real strain. A dedicated outlet within reach of the cord, on a grounded three-prong circuit, is the standard the manual will ask for.
Skip the extension cord. This is a bad idea for a compressor appliance specifically. Extension cords, especially longer or thinner-gauge ones, introduce voltage drop, and a compressor running on lower-than-rated voltage draws more current to compensate — heat that shortens compressor life or trips breakers under load. If the outlet isn't within the cord's reach, that's a sign to have one added near the cabinet, which is also when calling an electrician beats improvising.
Stand it upright before powering on. If the unit travelled on its side or at an angle — which happens more often than people expect during delivery — the compressor's lubricating oil can migrate into the refrigerant lines, and powering it on immediately risks running it without enough oil circulating. Standard practice for any tipped compressor appliance is to let it stand upright and undisturbed for a stretch first — commonly a few hours at minimum, sometimes closer to 24. Check your manual for the number it wants; when in doubt, wait longer rather than shorter.
The first run: pull-down time and what a normal first 24 hours looks like
Once it's leveled, powered from its own outlet, and switched on, resist the urge to judge it in the first hour. Compressor cooling takes real time to pull an empty cabinet down from room temperature to a 50-something-degree setpoint — for most undercounter units that's a matter of several hours, not minutes, and it takes longer if the room is warm or the door gets opened repeatedly to check on it. Set it and leave the door closed.
A normal first 24 hours includes: the compressor cycling on and off rather than running constantly (constant running while already cold is more often a sign of an airflow or clearance problem); a faint hum and occasional vibration, standard for compressor cooling; and the temperature display taking time to settle near the setpoint rather than snapping to it. What isn't normal is frost building up, a persistent burning smell, or the unit failing to get noticeably colder than room temperature after several hours — those are reasons to stop and troubleshoot rather than wait it out.
Load bottles gradually rather than filling the cabinet the moment it's plugged in. Bottles at room temperature add thermal mass the compressor has to pull down along with the air, and loading everything at once simply extends how long the cabinet takes to reach a stable temperature. Once it has stabilized, our wine fridge temperature guide covers what setpoint to use for storage versus serving. If, after a full day, the interior still isn't noticeably cold, work through our wine fridge not cooling checklist — grille clearance and levelling are the first two things it asks you to check, for good reason.
When to call an installer instead
Most of this guide describes work anyone comfortable with a tape measure and a screwdriver can do. A few situations are worth handing to a professional rather than improvising:
- No outlet within reach and none planned. Running new electrical to a cabinet is an electrician's job, not an extension-cord workaround.
- The opening was never built with ventilation in mind. A fully enclosed niche with no gap anywhere for a front grille to draw and exhaust room air is a carpentry problem to solve first, built-in-rated unit or not.
- Cabinetry or countertop needs to be cut or modified. Trimming a face frame or notching stone is a job for someone who does it regularly — a mismeasured cut on stone isn't something you get to redo.
- The manual conditions the warranty on professional installation. Read that section before you start, not after something goes wrong.
Three 15-inch models, and what's worth checking on each before you order
All three are sold in the standard 15-inch undercounter width. What differs is how much the listing tells you about installation type — which is exactly the detail this guide has been about.
01Confirmed built-in
Whynter BSR-033SW 15" Built-In
33 bottles · single zone · front-venting
33 bottles·Single zone·Compressor·Built-in or freestanding
The clean example in this guide: sold explicitly as a built-in undercounter wine refrigerator, with front-venting stated as part of the listing. Thirty-three bottles in the standard 15-inch cabinet width is an efficient use of the opening, and it's flexible enough to run freestanding too if your plans change later.
What a properly stated built-in spec looks like.
02Verify before enclosing
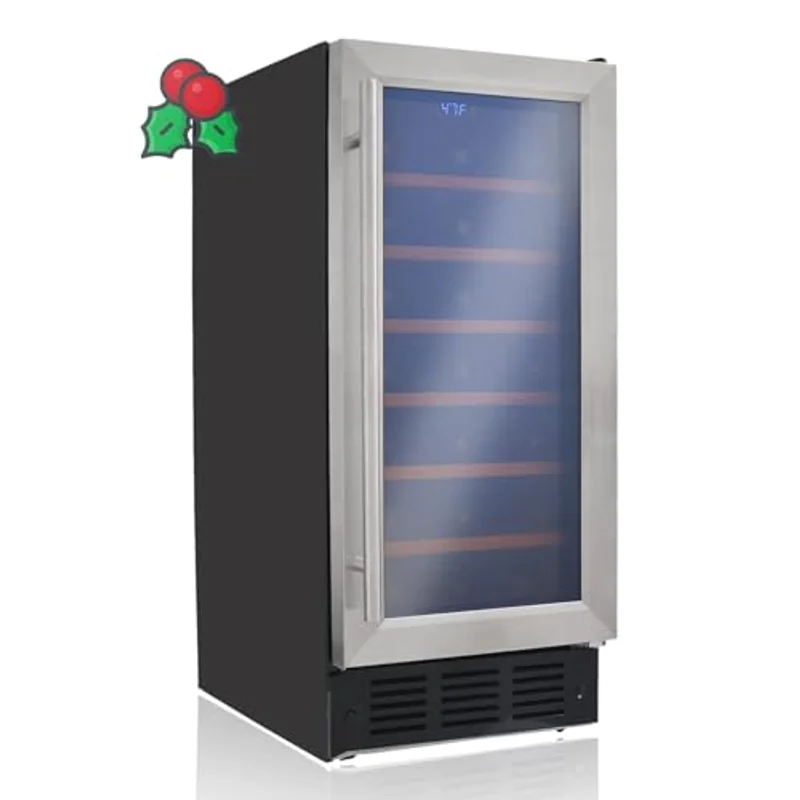
Techomey 15" 31 Bottle
31 bottles · single zone · check the manual first
31 bottles·Digital thermostat·Glass door·Stainless steel
Worth naming because its own listing title describes it two ways at once — "built in" and "freestanding" in the same breath, the exact ambiguity this guide warns about. That's not disqualifying, but the manual's installation section, not the title, is where you confirm whether it's rated to be enclosed before you build cabinetry around it.
Why the title isn't the authority — the manual's clearance section is.
03Confirm the cutout depth
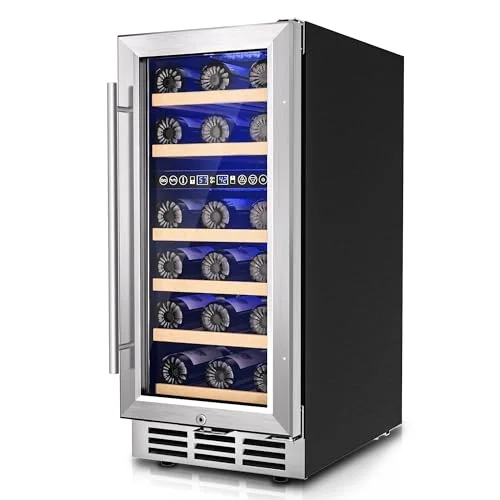
Icyglee 15" 30 Bottle Dual Zone
30 bottles · dual zone · confirm depth against your opening
30 bottles·Dual zone·Compressor·Silver
A dual-zone option in the same 15-inch width class, for anyone who wants a serving-temperature zone alongside cellar storage in the same footprint. We don't have a published cutout depth or stated installation type for this listing, so treat that as homework — pull the current listing's specifications, or the manual, before you cut or frame an opening around it.
Good candidate on paper; confirm the physical fit first.
How we researched this
This guide is built from published manufacturer installation manuals and specifications, current listing details, and well-established practice for compressor-based appliances generally — the same category refrigerators and freezers belong to, where clearance, levelling and dedicated circuits are standard guidance. Where a specification wasn't available for a named product — a cutout depth, a stated installation rating — we said so rather than guessing.
We do not run a testing lab, and we have not physically installed these specific units ourselves. We do not publish invented scores, star ratings or review counts — the retailer API doesn't return that data for this category, and we don't fabricate what we can't source.
Frequently asked questions
Can I install a freestanding wine fridge under my counter if I leave the door open a crack for airflow?
No — that doesn't solve the problem and introduces a new one. A freestanding unit needs airflow across its back and sides, not through the front door, so a cracked door does nothing for the compressor's heat rejection while letting warm, humid air into the cabinet continuously. The only fix is a unit rated by the manufacturer for enclosed, front-venting installation. See our built-in vs freestanding guide for how to tell the two apart before buying.
How much clearance does a built-in wine fridge actually need?
It depends on the specific model, and the manual is the only reliable source — treat any number you read elsewhere as a starting point to verify, not a figure to build cabinetry around. What's consistent across built-in units generally is that the front grille needs unobstructed room air on an ongoing basis, not just clearance on installation day.
Why won't my wine fridge door close by itself anymore?
The most common cause is a cabinet that's gone out of level, since most undercounter units rely on a slight rearward tilt for the door to self-close under gravity. Re-check the unit with a bubble level in both directions and adjust the feet before assuming the door hinge or gasket has failed.
Do I need an electrician to install an undercounter wine fridge?
Not if a grounded, dedicated outlet already exists within reach of the unit's cord — at that point it's a matter of sliding the unit in, levelling it and plugging it in directly. You do need an electrician if no suitable outlet exists nearby, since running new wiring or relying on an extension cord are the two options, and only one of them is safe for a compressor appliance.
Written by Ilane Tall. Research-based comparisons of published specifications, current prices and manufacturer installation manuals — we do not physically test or install these units ourselves and we do not publish invented scores.